Wednesday, October 6, 2010

Apple Cider Muffins

After apple picking last weekend Brian and I have A LOT of apples. For a family of more than 2, the amount might not seem huge, but our fruit bowl was overflowing and I worried about eating them before they went bad. Though we did make a pie, I found myself wanting something breakfast-y. I immediately remembered our delicious apple cider donuts-which then turned into a muffin idea. After searching the web for a bit I found this. This is not my recipe-I only added apples. (I don't remember where I found this-but let it be known-I love the recipe!)

These muffins are ridiculously addictive. They are moist and apple-y and pretty much evoke New England fall. Though this recipe calls for a bit more ingredients than normal, I think you'll find them to be very easy to make. Oh-and your house will smell divine when they are baking.


Yield 18 muffins

Streusel:
2 T. Packed Dark Brown Sugar
4 t. Flour
.5 t. Cinnamon
1 T. Unsalted Butter, Cold-cut into cubes
2 T. Chopped Nuts-Optional (I always leave the nuts out-I like my baked goods female)

Muffins:
2 C. Flour
1 1/2 t. Baking Powder
1/2 t. Baking Soda
1/4 t. Salt
1 T. Cinnamon
1/2 t. Nutmeg
1 Egg (large)
1/3 C. Packed Dark Brown Sugar
1/2 C. Apple Butter
1/3 C. Maple Syrup
1/3 C. Apple Cider
1/3 C. Plain Low-Fat Yogurt
1/4 C. Oil
2 Apples, Peeled, Cored & Diced

Method:
1. Preheat oven to 400. Place paper cupcake liners in muffin cups. Spray with cooking spray. Set aside.

2. In a small bowl, prepare streusel. Mix all ingredients and use your fingers to cut in the butter. Mixture should resemble coarse crumbs. Set aside.

3. Prepare muffins: Combine all dry ingredients in one large bowl and whisk together. Set aside.

4. In a separate bowl, whisk egg, brown sugar, apple butter, syrup, cider, yogurt and oil until smooth. Add apples.

5. Make a well in the dry ingredients-add the wet ingredients and gently fold together until combined. Scoop batter into pans and sprinkle with streusel.

6. Bake 20-25 minutes. Cool in pan 5 minutes then remove and cool on a wire rack.

So far these muffins have remained moist and fresh for 5 days-we keep them on the counter in an airtight container.

Wednesday, August 26, 2009

Marinated Lamb w/ Pomegranate Molasses


Let me just put this out there: I read a lot of recipes. I mean, a lot. As a private chef I pride myself in delivering a wide variety of meals to my employer. In fact, up until last week I had not repeated a single recipe! As you can imagine, this can become very challenging and time consuming. Often, I find myself flipping through cookbooks, food blogs, recipe sites and magazines wondering when that one recipe I need is going to jump out at me. Sometimes it never happens and I combine a few to create my own dish-and while I enjoy doing this, again, it's time consuming. And I don't have the money to test them before I cook them. So unless I have Guinea pigs to cook for, I tend to stick to recipes I've made or recipes that sound like they can't fail.

Until tonight. Tonight I made lamb marinated in garlic, cumin seeds and pomegranate molasses. Believe it or not, up until last week I had never even heard of pomegranate molasses, but when I did, it intrigued me so much so that I scoured the Internet trying to find every recipe possible. I imagined my employers licking their lips and sighing with satisfaction all the while trying to figure out where exactly the flavors are coming from. This, more than anything, convinced me to make the following dish...

Marinated Lamb w/ Pomegranate Molasses


For the molasses:
2 C. Pomegranate juice
1/4 C. Sugar
1/8 C. Lemon Juice

For the marinade:
1 t. Cumin Seeds
1/4 C. Pomegranate Molasses
1/2 C. Olive Oil
4 Cloves Garlic, smashed
1 t. Oregano
1 t. Salt
1/2 t. Pepper
1/2 t. Cinnamon

1# Boneless Leg of Lamb, cubed
1 Red Pepper
Optional: Skewers

Method:

1. In a small sauce pan, combine ingredients for the molasses. Bring to a boil & reduce by 1/2. Set aside and allow to cool.
2. In a large plastic Ziploc bag, combine the ingredients for the marinade (add the molasses after it's cooled down a bit). Add the meat & marinate for 2-5 hours turning frequently. (I marinated it for 5 hours.)
3. Cut red pepper into strips and then squares. At this point you can either:
  • Make Kebabs alternating meat & peppers & grill them for 4 minutes (turn often)
  • Place meat, peppers and marinade in a small baking dish & broil them for 4-7 minutes (turning often)
Tonight I opted for broiling the lamb. I stirred the meat half way through. The result was fantastic. The broiler made the meat caramelize and the peppers softened just enough. I think that cooking the meat in the marinade also helped boost the flavor.

The meat was served with lemon couscous and a cucumber, tomato and mint salad. Overall, a very successful dinner.

The next time I make this, I am going to try using the marinade on lamb chops. It would probably also taste good on beef.

Sunday, August 9, 2009

Mongolian Beef

Stock Photo

Asian cooking tends to involve a plethora of prep work. It's said that in order to preserve fuel, they cut up their meat and vegetables into very small pieces (hence the length of time it takes to prep) and cooked it quickly over very high heat. Luckily this recipe doesn't involve any veggies, so your prep time will be significantly less.

I have to admit that I began this with great trepidation. Not because it is difficult, but because the family I cook for has Asian roots. The ingredients though are straight forward and the method easy...and it quickly became one of their favorite dishes.


Ingredients: Yield 4

2 T. Tamari Sauce (Regular Soy Sauce will work fine)
2 Dashes Hot Pepper Sauce (I used Tobasco because it's all we had)
1 T. Cornstarch
1 T. Rice Wine Vinegar
______________________
2 T. Peanut Oil
1 Inch Fresh Ginger, cut into strips
4 Cloves Garlic, sliced
1 # Beef Sirloin, cut into strips
3 Bunches Scallions, greens only, sliced

Method:

1. Combine all of the ingredients above the line in a bowl. Whisk to ensure there are no lumps. Set aside.

2. In a large skillet or wok, heat the peanut oil. Add the ginger & the garlic & saute 2 minutes being sure it does not burn. Remove and discard.

3. Into the oil, add beef and saute until browned. Add sauce and allow to thicken, usually about 1-2 minutes. Garnish with scallions & serve over rice with steamed broccoli.

Ratatouille with Sausage


I modified this recipe to include sausage because it was fresh from the farm share & added wine because I felt it lacked something. Topping it with cheese was just the added "umph" this casserole needed. It's a hearty, comforting dish that even tastes better the next day.

This can easily be turned into a vegetarian dish simply by omitting the sausage...

Ingredients:

1 Eggplant, peeled & cut into 1" strips
3 Small Zucchini, sliced
1/3 C. Flour
2-4 T. Olive Oil, divided
2 Yellow Onions, sliced
3 Cloves Garlic, Minced
8 Sweet Italian Sausages, uncooked
2 Green Peppers, Julienned
4 Tomatoes, Coarsely chopped
1/4 C. Water
1/2 C. Fresh Basil, chopped (or 8t. Dried)
2 t. Oregano
2 t. Thyme
1 t. Salt
1/4 t. Pepper
1 C. Mozzarella, shredded
1/2 C. White Wine

Method: Preheat oven to 350*, Grease a large rectangular pan (9x13)

1. Place eggplant, zucchini & flour in a large bowl. Toss to cover veggies.

2. Heat 1 T. oil in a large skillet. Brown veggies in batches & transfer to a greased baking dish.

3. Saute onions & garlic, add to dish.

4. Brown the sausage. Remove from pan and cut in slices (on a diagonal). Add sausage to baking dish.

5. Saute peppers. Add tomatoes, water, wine & seasoning. Cook on high for 2 minutes. Reduce to low, cover & simmer for 5 minutes.

6. Pour tomato sauce over veggies & sausage in the baking dish. Bake 20 minutes uncovered. Top with cheese & bake an additional 10 minutes or until the cheese is bubbly & brown.

Monday, June 29, 2009

Sausage & Pepper Casserole

I'm not certain if every Italian American child growing up was stuck eating sausage and peppers every week, but I was. To make matters worse, every family function seemed to have acres of the stuff in addition to the obligatory pasta dishes and meatballs. Luckily, the trend seemed to die and the dish is almost never thought of.

I work as a part-time private chef and have secretly prided myself in the fact that I have not yet served the family the same meal twice. As you can imagine, coming up with interesting dishes that are also kid friendly is sometimes challenging. I find myself pulling from every source possible, including my childhood. Of course sausage and peppers came to mind-but then quickly got discarded. I couldn't possibly make this nice family eat this simple casserole I was forced to eat, could I?

The answer was no...and yes. I could jazz it up and combine a few recipes and come up with something 100 times better than the basic sausage, green pepper and potato dish I was stuck with. And that's just what I did. The changes were rather simple-I switched from green peppers to red, added a crunchy topping and roasted the potatoes separately. Apparently I did good because everyone-including the littlest girl-had seconds.

Sausage & Pepper Casserole

1 # Sweet Italian Sausage, sliced on a bias
1 White Onion chopped
2 Red Pepper, Julienned
1 Can Cannellini Beans, Drained
4 Cloves Garlic, Minced
2 C. Chicken Stock
2 T. Brown Sugar
2 T. Tomato Paste
1/2 t. Thyme
Black Pepper, to taste
2 Bay Leaves
1 1/2 C. Panko
Olive Oil
1 1/2 # Roasted Potatoes

1. Saute onion & sausage together until brown. Add garlic & red peppers. Saute 3 minutes.

2. Combine stock, sugar and tomato paste. Add to pan & stir.

3. Add thyme, beans, bay leaves and pepper. Boil and simmer about 7 minutes or until liquid is slightly reduced. Remove from heat.

4. Using the same pan, top with panko, sprinkle more thyme and drizzle with olive oil. Bake at 350 for 15 minutes or until browned. Allow to rest for a few minutes. Meanwhile, add a few potatoes to each bowl. Top with sausage mixture and serve.

Thursday, March 19, 2009

Oooo La La!

For years I have been obsessed with the way they look. They are colorful and perfect and come from fancy bakeries and call places like Paris home. And it's said that they are almost impossible to make right in your own kitchen which makes them even more sexy to me.

They are French Macaroons.

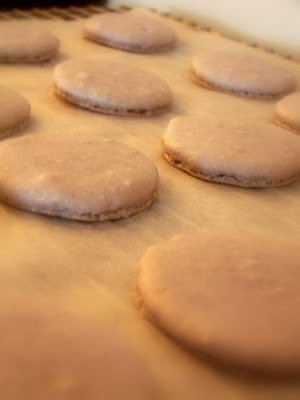
These sandwich cookies are made of egg whites and almond powder and are crispy on the outside and extraordinarily chewy on the inside. These days flavors range from chocolate & raspberry to pistachio, fig and lemon. Their signature is the "foot" that forms under each cookie while in the oven. Without this foot, macaroons just don't look like macaroons.

Before today I've never attempted to make them in my own kitchen. Everyone I've ever talked to threw their hand in the air and scoffed when talking about their first experience with these delightful cookies making me shy away from trying my own hand at them. For over a year I have been reading and researching different techniques and finally decided to see what all the fuss is about.

I am in love.

The recipe I tried was one for Raspberry & Chocolate Macaroons. Below you fill find the recipe (courtesy Epicurious.com) and the tips that I applied to said recipe. My macaroons came out just the way they should have-crispy, chewy and yes, they had feet. And soon, they will be gone.

Things to know before starting:
1. Use room temperature egg whites. Once they are room temperature, microwave them in a glass bowl for 10 seconds.

2. Use a template to draw circles on the parchment paper so that each cookie is the same size.


3. I allowed the cookies to air dry for 45 minutes prior to baking to form a crust.

4. The cookies that came out the best were the ones that I did not allow to crack like it says in the recipe. Total cooking time was about 14 minutes.

5. Once the cookies are out of the oven, place them (parchment paper and all) on a slightly damp cloth. This will help them come off the parchment easier. Peel them off and cool completely.

Raspberry Chocolate French Macaroons
For macaroons
6 oz sliced blanched almonds (not slivered; 2 cups)
1 1/2 cups confectioners sugar
3 large egg whites
3/4 teaspoon salt
3 tablespoons granulated sugar
Red or pink food coloring

For chocolate raspberry ganache
3 oz fine-quality bittersweet chocolate (60 to 64% cacao), finely chopped
1/3 cup heavy cream
1 tablespoon unsalted butter, softened
1/16 teaspoon raspberry extract (preferably McCormick brand)

Special equipment: parchment paper; a gallon-size sealable plastic bag (not pleated)

Make macaroons:
Line 2 baking sheets with parchment paper.

Pulse almonds with 1/2 cup confectioners sugar in a food processor until very finely ground, 2 to 3 minutes, then transfer to a bowl. Sift in remaining cup confectioners sugar, stirring to combine.

Beat egg whites with salt in another bowl with an electric mixer at medium speed until they just hold soft peaks. Add granulated sugar, a little at a time, beating, then increase speed to high and continue to beat until whites just hold stiff, glossy peaks. Add drops of food coloring to reach desired shade and mix at low speed until evenly combined. Stir almond mixture into meringue with a rubber spatula until completely incorporated. (Meringue will deflate.)

Spoon batter into bag, pressing out excess air, and snip off 1 corner of plastic bag to create a 1/4-inch opening. Twist bag firmly just above batter, then pipe peaked mounds of batter (the size of a chocolate kiss) onto lined sheets about 1 1/2 inches apart. Let cookies stand, uncovered, at room temperature until tops are no longer sticky and a light crust forms, 20 to 30 minutes.


Meanwhile, put oven racks in upper and lower thirds of oven and preheat oven to 300°F.

Bake cookies, switching position of sheets halfway through baking, until crisp and edges are just slightly darker, 20 to 25 minutes. Cool completely on sheets on racks, about 30 minutes.


Make ganache while macaroons bake:
Melt chocolate with cream in a metal bowl set over a pan of barely simmering water or in top of a double boiler, stirring until smooth. (Bowl should not touch water.) Remove bowl from heat, then add butter and raspberry extract, stirring until butter is melted. Let stand at room temperature until cooled completely and slightly thickened.

Assemble cookies:
Carefully peel cookies from parchment (they will be fragile). Sandwich a thin layer of ganache (about 1/2 teaspoon) between flat sides of cookies.

Filled macaroons keep in an airtight container at room temperature 3 days.

Monday, January 5, 2009

Open For Business

Please visit my Etsy Shop. If you have a special request, I'm happy to add it for you as long as it is shippable.

Here are a few items for sale:


All items are handmade by me on the same day of shipment. Thank you for stopping by!

Fleur de Lis Catering, Etsy Shop